by Jessica Espinoza
Health Impact News
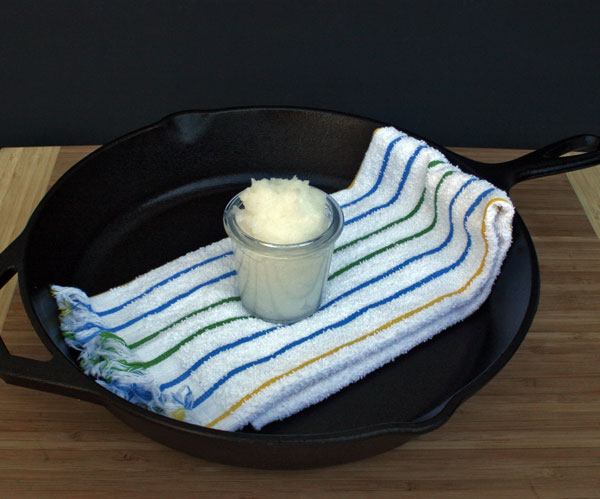
There are literally hundreds of uses for coconut oil and the list only continues to grow. In addition to being part of a healthy diet and used for a wide variety of beauty applications, you can also use coconut oil for a number of other things as well. One of the ways that I use coconut oil in my home is for seasoning my cast iron pans and conditioning my wooden cutting boards.
I have always used cast iron pans. My mother grew up in the South using cast iron and she has passed the tradition along to me. Cast iron is durable and if properly taken care of, it can be passed down from generation to generation. Once the pans are properly seasoned, they are a low maintenance and safe alternative to other pots and pans (i.e. no nasty chemicals leaching into your food!). The seasoning process helps maintain the integrity of the pan, reduces sticking, and makes clean-up a breeze. And, it’s really easy to do!
How to Season Cast Iron Pans With Coconut Oil
In order to season your cast iron pans, you need a few simple tools:
- Cast iron pan(s)
- Coconut oil
- A dry cloth or sponge
- An oven
The first thing you want to do is to make sure you pan is clean. Cast iron is not ideal for those people who like to leave their pans to soak for hours on end. It also cannot go in the dishwasher, so hand-washing is required. You should clean your pan once you’re done cooking and the pan has cooled enough to handle. If your pan is properly seasoned, cleaning should be as simple as rinsing the pan out with hot water. If you have some food that is stuck on the pan, use a non-metal scrub brush or sponge and gently scrub the spots. Make sure you don’t scrub too hard, or you may end up removing some of the black layer (this is the seasoning). You can also use course salt and a little water and it will act as a gentle abrasive, but not enough to harm the pan. Soap is not recommended. Dry the pan completely and now you’re ready to move on to the seasoning.
Keep in mind that the seasoning of cast iron is an ongoing process. Each time you cook something in the pan, it is helping season it a little more. You’ll often notice that your pans will get darker after many uses. That said, there are times when the seasoning may have been scrubbed off, or perhaps the cast iron has started to rust a little. When this happens, you just need to do a full re-seasoning of the pan. To do so, simply follow these steps:
- Preheat your oven to 325°F. Place a sheet pan or some foil over the lower rack of your oven while the oven is cool. You can also season your pans on a grill if you would prefer. This keeps the mess and potential smoke outdoors.
- Using your fingers, a cloth, or dry sponge, spread a layer of coconut oil around the inside and outside of the skillet. You can use virgin or refined. I use refined. Some people will season the bottom of the pan, but I prefer not to, because I find that it can create a lot of smoke the first few times you use it on the stove top. Make sure the inside is coated completely.
- Place your pan face down on your top oven rack.
- Bake in the oven for 90 minutes. There is a chance of smoke, so I like to keep my stove fan running and also open the windows if appropriate.
- Turn off the oven, but don’t open the door. Let the pan cool in the oven and then repeat as needed. Sometimes one session is all you need, but if it’s a new, unseasoned pan, or one that has had the seasoning worn off, you may need to repeat the process a few times for a stronger bond.
Properly seasoned pans won’t regularly need to be re-seasoned, but if you see that the black coating is wearing off, experience any rusting, or see uncoated metal showing through, then it’s time to re-season. Each time you wash your pan, dry it thoroughly and rub a little coconut oil into the pan. You can use a dry towel to remove any excess oil and this will help preserve the baked on seasoning on the pan.
Using Coconut Oil to Care for Wooden Cutting Boards
Wooden cutting boards are a common kitchen tool and like cast iron, with proper care and maintenance, they can last for decades. I have a wooden cutting board that is over 60 years old (made my by grandfather and passed on to me by my aunt) and it’s still in great condition. I love having this piece of history in my kitchen and this tie to loved ones who have long since left this earth. Wooden cutting boards are also much more gentle on your knives, meaning you don’t have to sharpen them as often, plus you are not risking exposing your food to the toxic chemicals found in plastic cutting boards. Glass cutting boards are also common and while they are easy to clean (since you can toss them in the dishwasher), they are very hard on your knives and will dull them much quicker.
Wooden cutting boards need to be conditioned between uses and one of the most common oil that is used is mineral oil. Now, if you’re like me, you will want to avoid mineral oil (even “food grade”), as it is a petroleum product, which can create a wide variety of health issues. Not something that I want to be exposing my food to. While you could use almost any oil to condition your cutting boards, it is wise to steer clear of olive and vegetable oils, as well as nut and seed oils, as they go rancid very quickly — yet something else you don’t want to expose your food to. My oil of choice? Coconut oil, of course!
Coconut oil has natural antimocrobial properties, making it a potent germ killer. Many people are afraid of using wooden cutting boards because they fear they cannot be sanitized properly to prevent illness (I was one of those people, believe it or not!), however, I have since learned that when properly cleaned and maintained, wooden cutting boards are perfectly safe. The antiviral, antibacterial, and antifungal properties of coconut oil come from the medium chain fatty acids/triglycerides (MCTs) found in this oil. Lauric acid is the most predominant MCT found in coconut oil and it packs a strong antimicrobial punch. Research has shown that microorganisms that are inactivated by coconut oil include bacteria, yeast, fungi, and enveloped viruses. All of this makes coconut oil a fantastic oil to use to treat and condition your wooden cutting boards and chopping blocks. In addition, wood itself, has been shown to have natural antimicrobial properties, so paired with the strength of coconut oil, there is very little to worry about in the way of germs.
Before you condition your cutting board, make sure it is clean and dry. To clean your cutting board gently scrub the board with hot water and a gentle soap. Rinse dry. Do not completely submerge your boards, don’t let your wooden boards soak in water, and don’t run through the dishwasher. Let air dry completely before storing or conditioning. I like to towel dry them and then let them air dry on a rack, so the air can circulate. Sometimes, when a board is just propped up to dry, moisture can create cracks in the bottom edge.
You can also quickly sanitize your cutting boards by giving them a spray with full-strength white vinegar. Spray it on, let it sit for a few seconds and then wipe off completely with a towel. You can follow-up with a spray of 3% hydrogen peroxide, let sit for a few seconds and then wipe off. I keep a spray bottle of each of these liquids on hand for quick sanitizing jobs like this. Let your board air dry.
If your cutting board has any odors, you can easily remove those by sprinkling a little course salt on your board (a tablespoon or two, depending on the size of your board) and then using half of a lemon (cut side down) as your scrubber. Rub the salt around with the cut lemon until your board is completely covered. Let the mixture sit on the board for a few minutes and then rinse off and dry completely.
Once your board is clean, deodorized, and completely dry, you can condition it. Conditioning the wood will help preserve it and prevent it from drying out and cracking. It’s easy to do with just a few simple steps:
- Take some coconut oil (virgin or refined) and start rubbing it into the wood. Depending on the size of your cutting board and how long it has been since it has been conditioned, you may need anywhere from a teaspoon to a tablespoon.
- After the board has been completely coated with coconut oil, let the board sit for a few hours or even overnight. If the wood is really dry, it will soak up the oil very quickly.
- Wipe the excess oil off with a soft cloth and re-apply as needed. If your board has never been conditioned or has dried out, it may take a couple coats. Re-apply the coconut oil until it doesn’t soak in anymore.
Your board is now ready to use!
Keeping your cast iron and wooden cutting boards in tip-top shape is easy with the use of a little coconut oil!
Read the full article here: http://healthimpactnews.com/2013/how-to-use-coconut-oil-for-seasoning-cast-iron-pans-and-conditioning-wooden-cutting-boards/
Virgin Coconut Oil:
How it has changed people’s lives and how it can change yours!
Includes 85 recipes – Free shipping available!


 HHS Secretary Kennedy Breaks His Promise: "War on Saturated Fat" Kept in Tact with New U.S. Dietary Guidelines
 Research Continues to Show Virgin Coconut Oil's Effectiveness in Treating Cancer
 Coconut Oil Continues to Benefit Alzheimer's Patients over Drugs as Studies Continue for Neurological Benefits
 How the Simple High-Fat Low-Carb Ketogenic Diet Continues to Change People's Lives
 New Studies Continue to Show that Coconut Oil is the Best Oil for Treating Skin Conditions and Maintaining Healthy Skin and Teeth